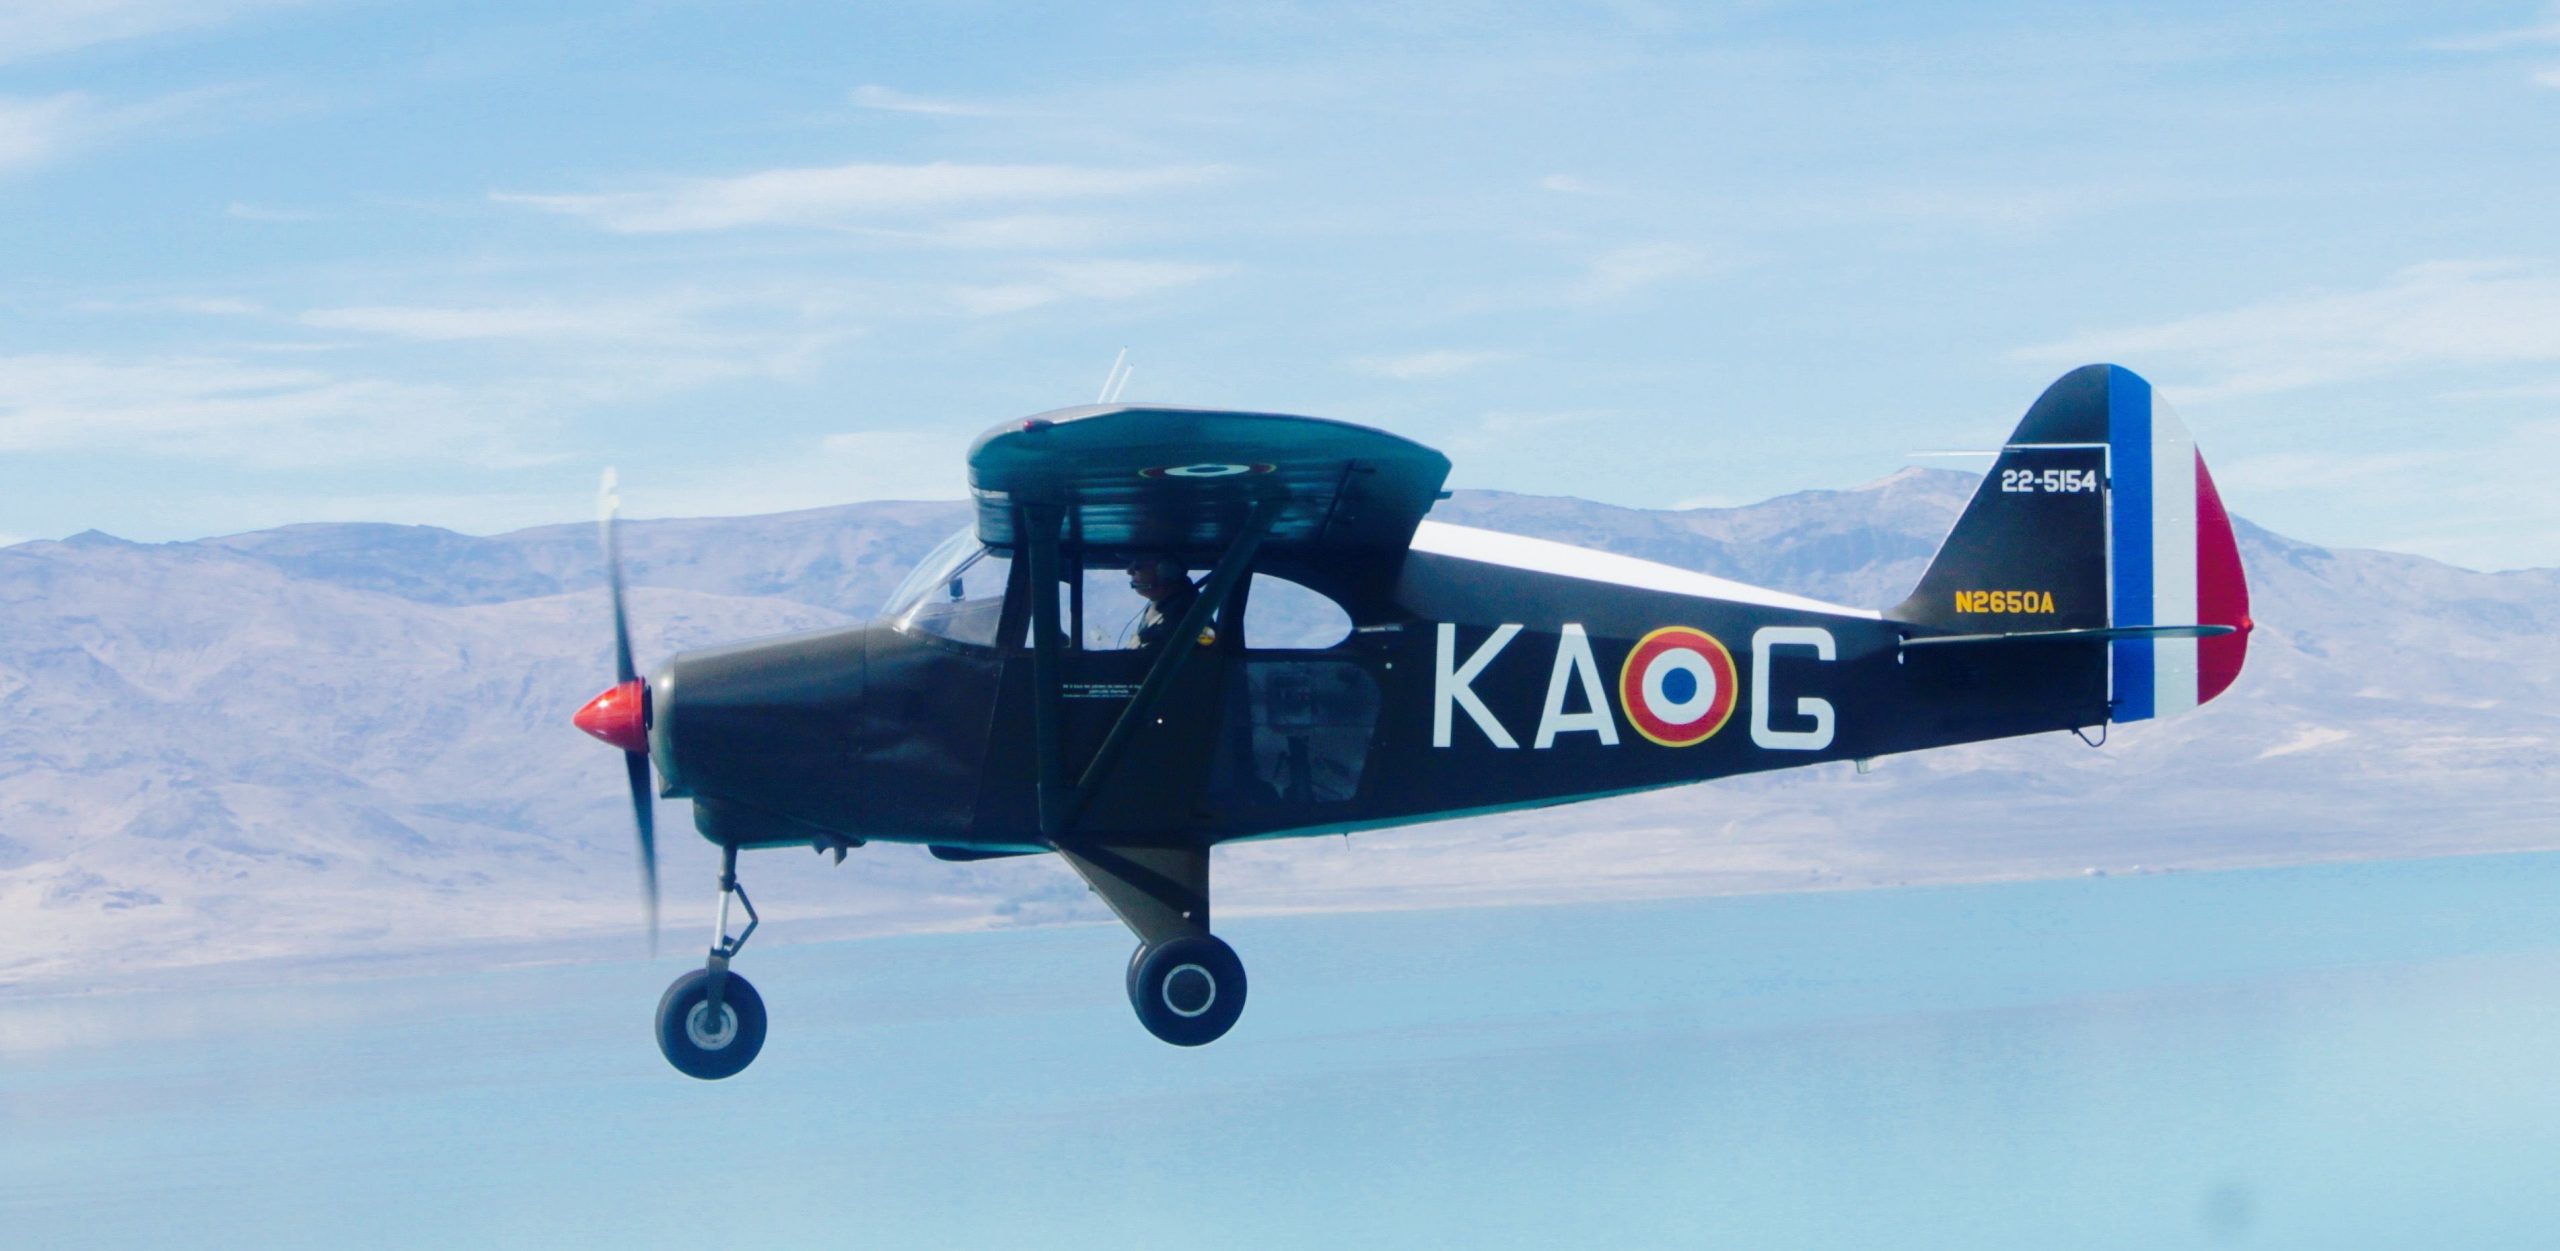
This is segment number three and will cover the art of tactical marking, materials and final finishing techniques for my PA 22 French War Bird project. In less then a year’s time the work from finding an ideal aircraft, interior; exterior restoration and historical transformation finally came to completion. I now had a historically correct representative of a PA 22 flown by French Marine Corps pilots and crew in support of the French Foreign Legion. KAG served the Legion as a Forward Air Controller (FAC) during the later part of the Algerian war during the 1950’s and 1960’s.
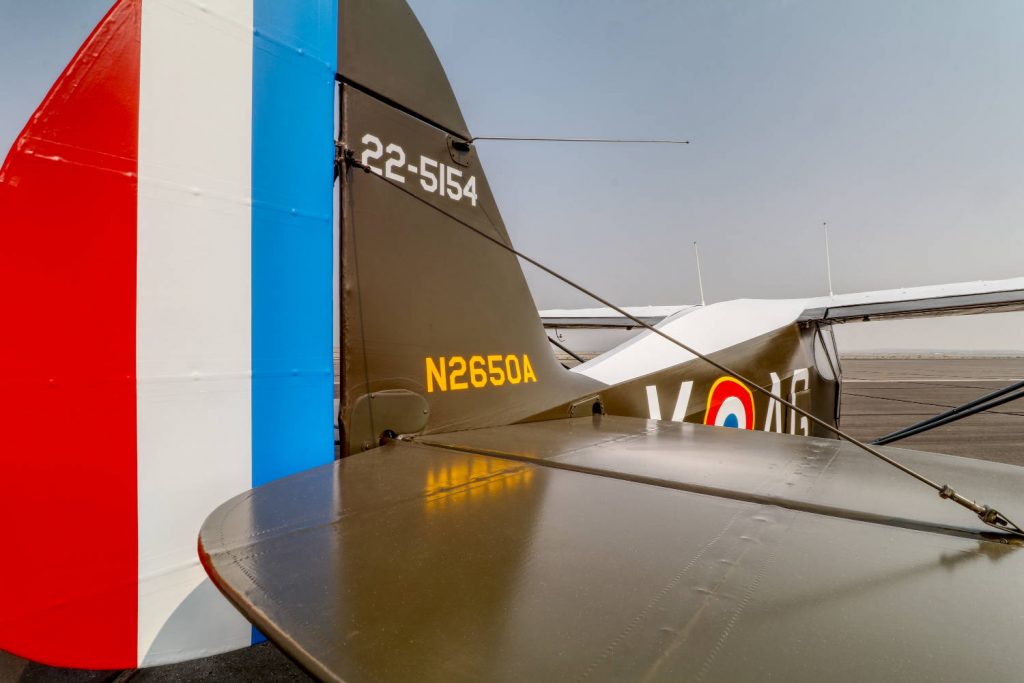
PA N2650A’s detailed paint scheme from French Marine Corps records.
N2650A having been restored and painted now was ready for the tactical markings of KAG. I had researched with the help of the French Air Force Museum in Dax France for color chips; interior leather colors and the white FAC cross on her wing and fuselage. With any war bird the FAA still requires the US registration numbers to be on the aircraft. I picked the yellow colors of lettering on US liaison aircraft of the WW2 and into the 1950s, as it had to be on the aircraft and fit very well into the color of all the other tactical markings.
James Hagan of Aerographics advised and consulted for the tactical markings as I provided him the French spec marking design. He assisted in how to apply the marking transfers and I requested they be printed in a matt finish. The secret for these markings is to apply with soapy water and use a squeegee to affix them to the aircraft. Wetting the transfer allows you precise placement. Once you squeegee out the bubbles and water and they go on perfectly. Any miniscule air bubbles will in time disappear and if not a small sewing needle poke will release any trapped air. Do be confident of placement because your not changing the transfers position after the first run of the squeegee!! If you do misplace, by using a hair dryer or a heat gun with extreme expertise you can remove the misplaced transfer. It will only cost you a new one because once removed they are destroyed.
The French Marine Corps emblem went on like spray paint.
I placed the first transfer on and it went on like it had been spray painted, just perfect. Use a laser level because on a Tri Pacer there is not one panel line that is level to the earth!!!